Illustrator tutorial-How to use the gradient tool
This is another beginner tutorial on adobe illustrator. In this tutorial we will learn how to use the gradient tool. This is a very important tool. On most of the tutorial I have used this tool. So, I strongly recommend you to see this valuable guide attentively. Otherwise you may not be able to realize the advanced tutorials such as 3d and complex shape tutorials.
Learn about the gradient pallete of illustrator:
The gradient tool is a very much important tool. With this tool we can make many unbelievable vector artwork. In this tutorial we will know how to use gradient tool illustrator.
See the images below to learn about the gradient panel.
Working with gradients:
At first create a rectangle with the rectangle tool (M) and fill it with any color. Then selecting the object, go to the gradient window. Click on the gradient slider. You will see the slider with two color buckets stand on both sides. Double click on one of the color bucket any fill it with any color. Do the same for the rest color bucket. You can also change the color by selecting a bucket and change the fill color option from the toolbar. See the image and try it yourself.
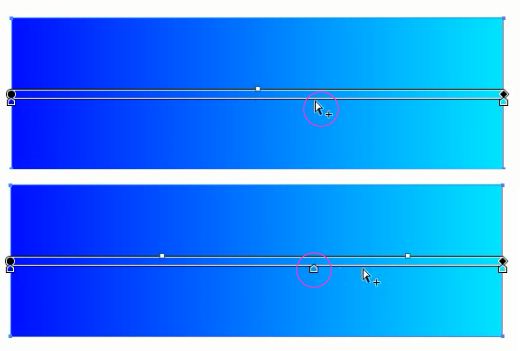
To add more color you have to add more color buckets. Bring the mouse pointer to the gradient bar. You will notice a small plus (+) icon behind the pointer. Now, press the left button to add a bucket.
There are two type of gradient; linear and radial. I think you got it already about these options.
I think you have enjoyed this tutorial. After all, if you have any question or want to say thanks to me, don't forget to comment. Thanks for reading this tutorial on adobe illustrator.
Illustrator tutorial-How to use the gradient tool
 Reviewed by Unknown
on
6:41 PM
Rating:
 Reviewed by Unknown
on
6:41 PM
Rating:


.png)
.png)


No comments: